How Tour Images Were Converted
A short explanation of how the tour photographs were brought across from the old website, and what to ask the designer for in future.
Where the images came from
Section titled “Where the images came from”The tour photographs were supplied by the designer as EPS files. EPS is a print format. The images are built for paper, not for screens, and they cannot be put on the website as they are.
So every image had to be converted from EPS to a web format (WebP) before it could be uploaded.
Why the colour matters
Section titled “Why the colour matters”Converting from a print format to a screen format is not automatic. Done the wrong way, the colours come out oversaturated, too strong, too dark, with the detail lost in the shadows.
We tested the options and chose a conversion method that keeps the colours natural and true to the original photograph.
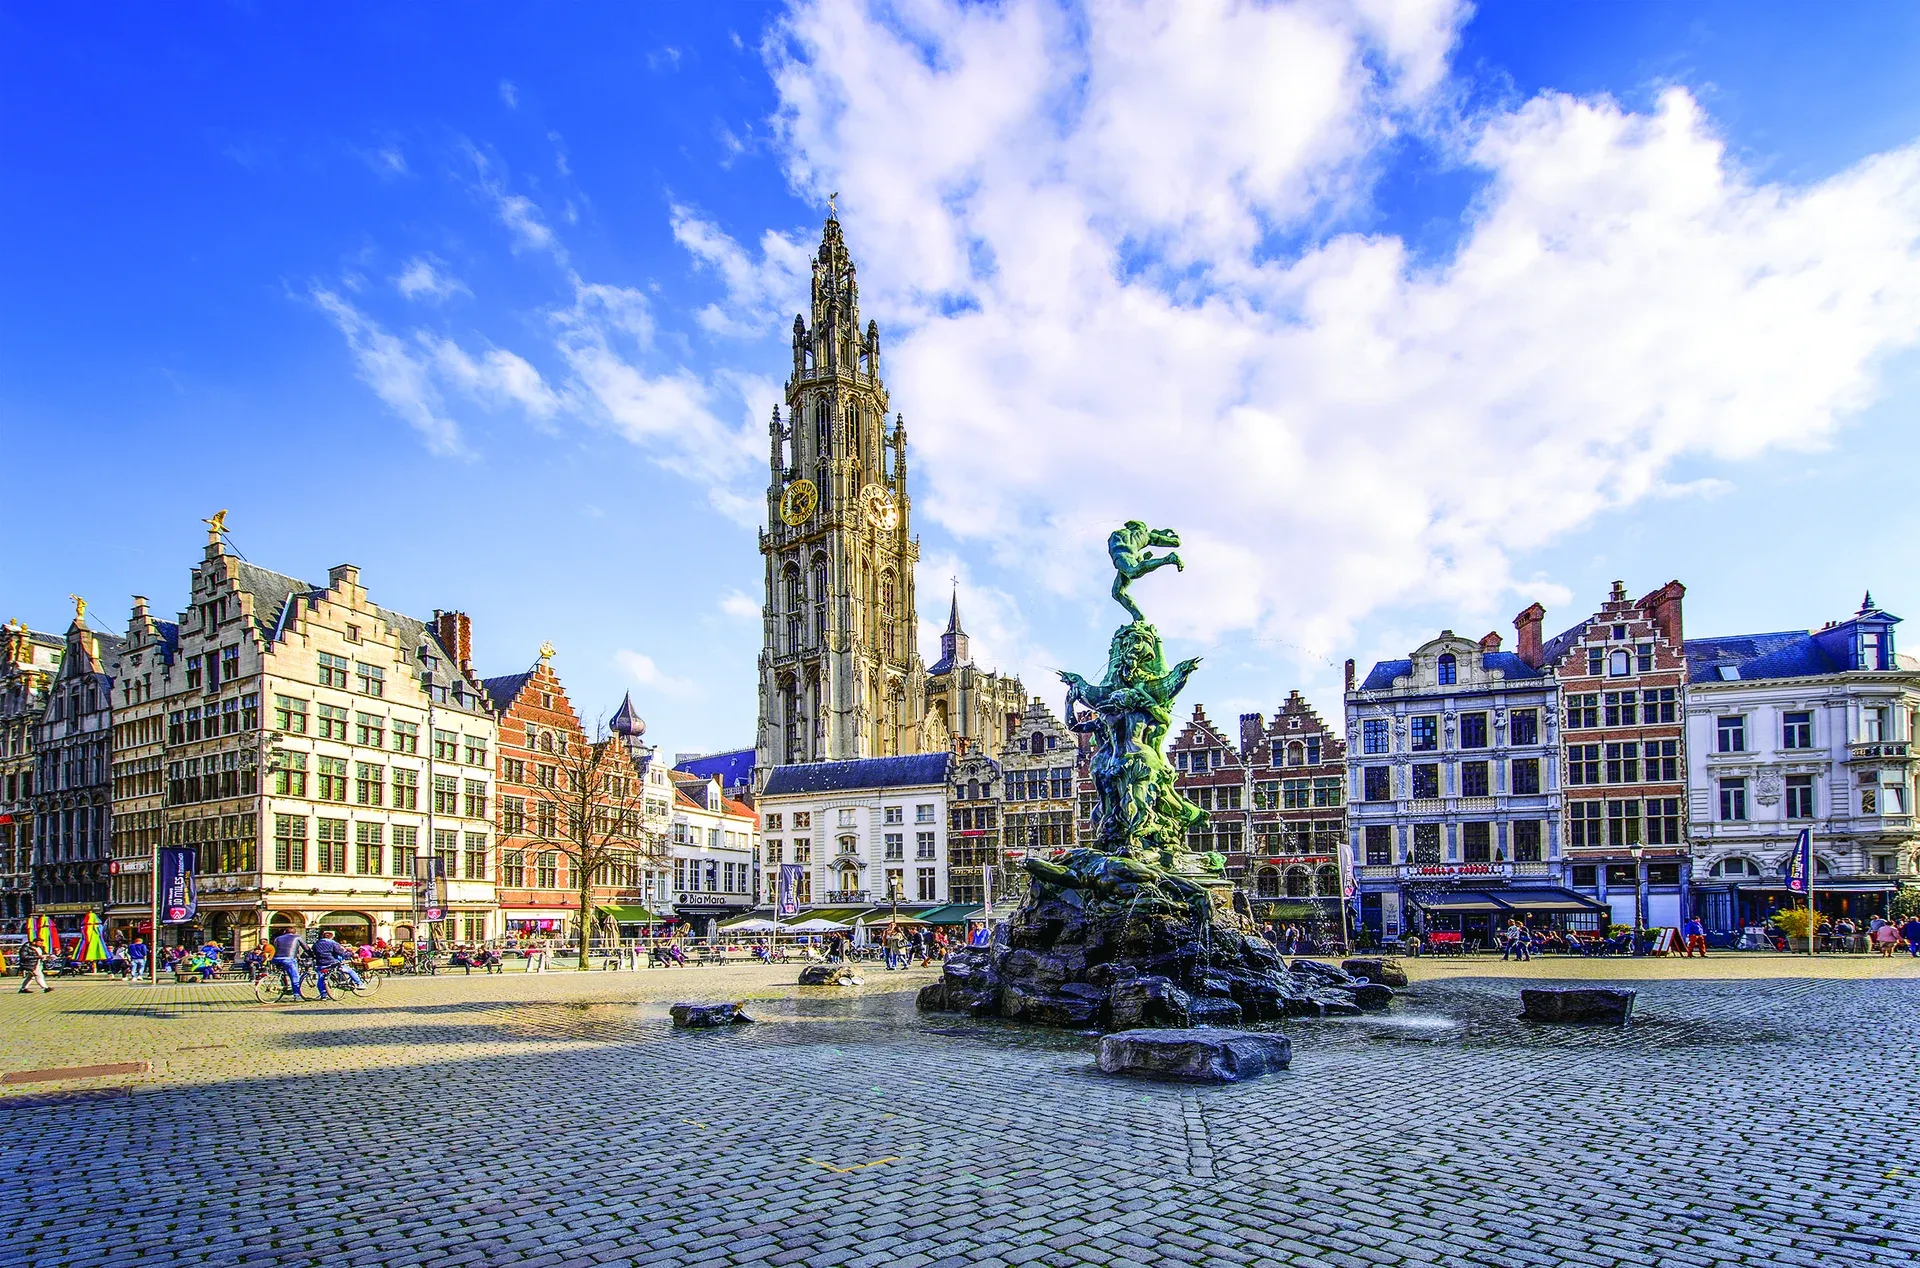
Here is the difference on the same image.
Converted the wrong way (oversaturated):
Converted the way we chose (natural):
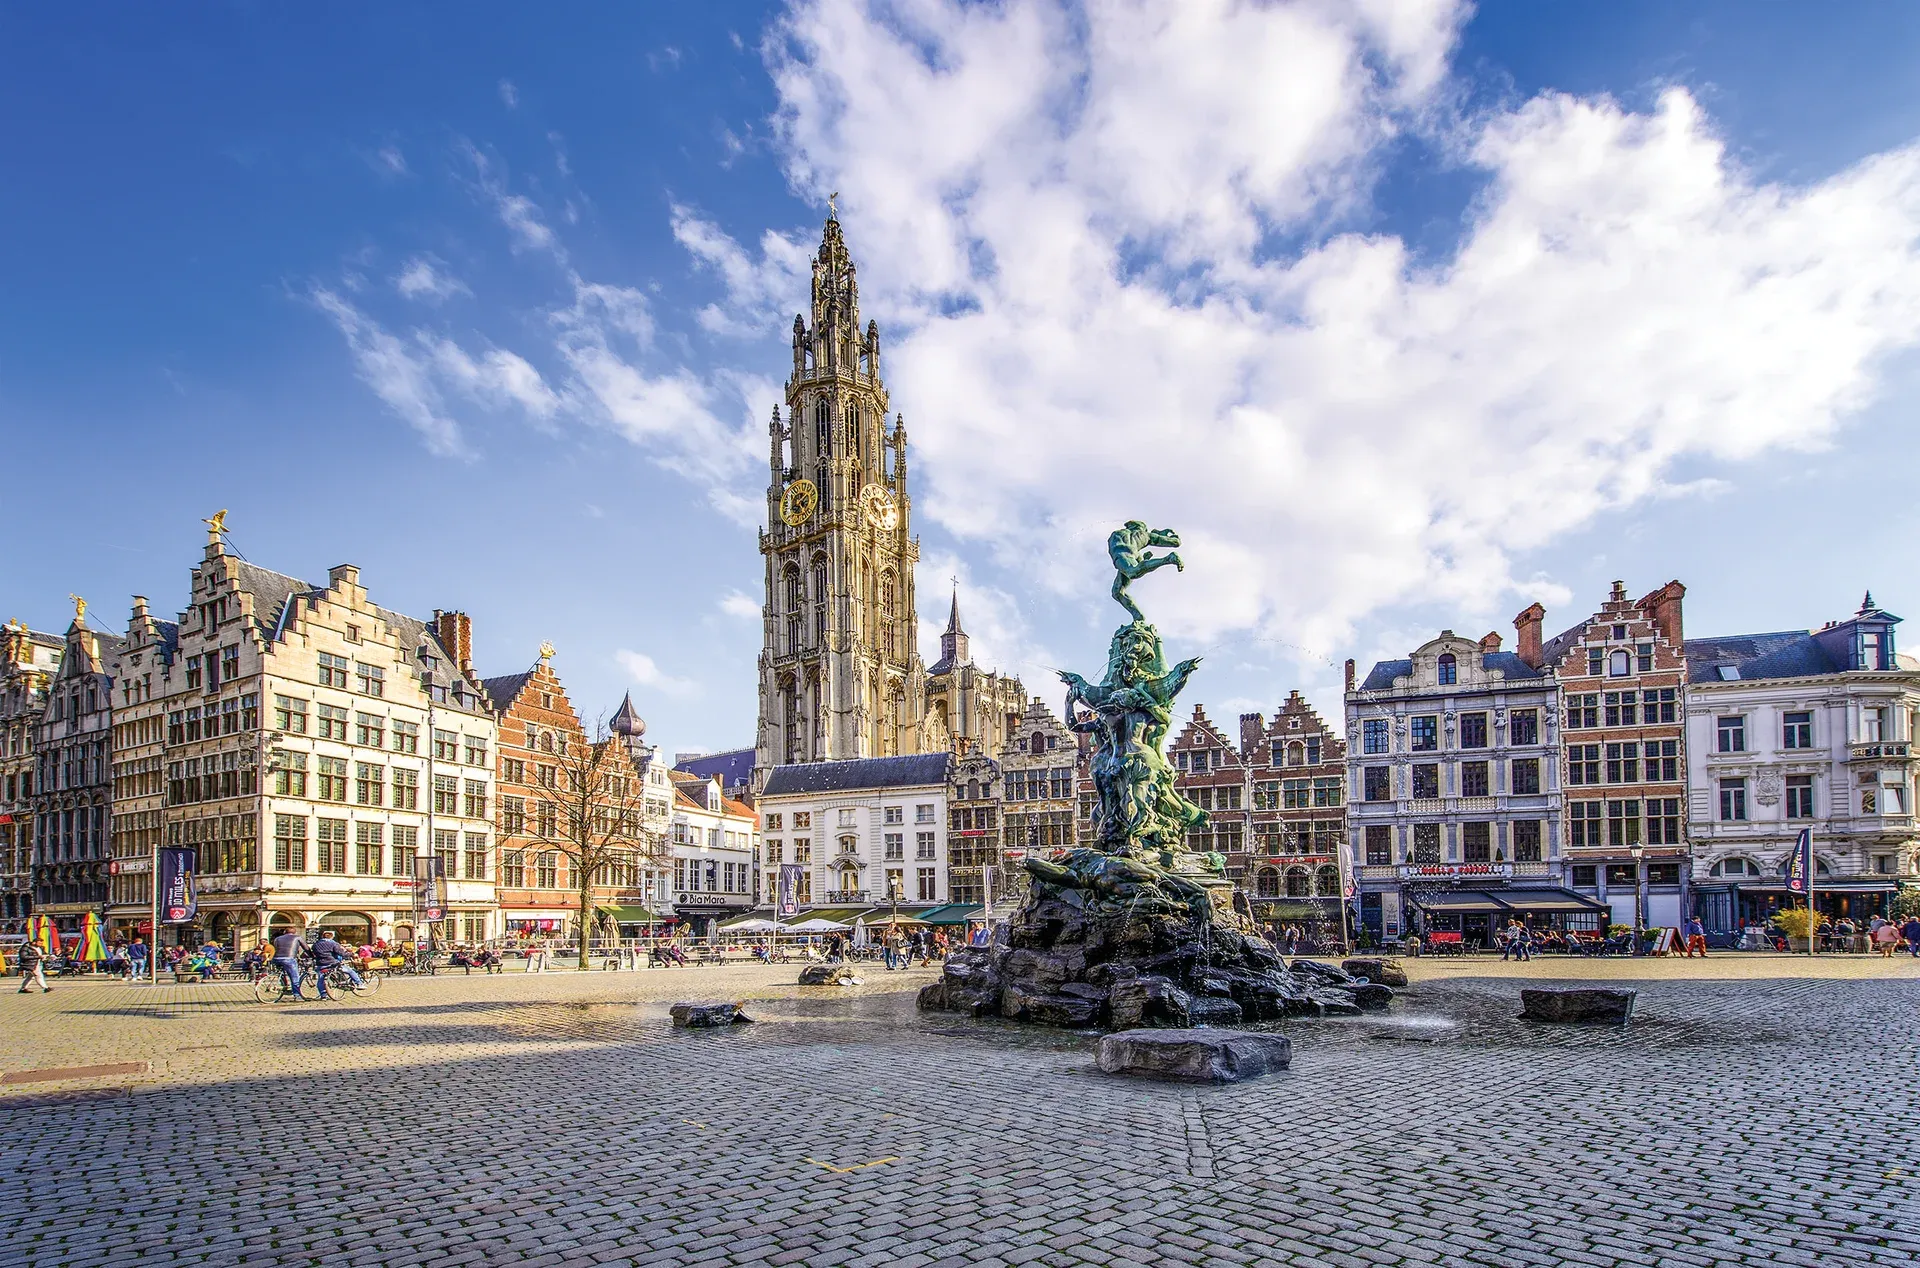
In the first image the buildings look heavy and the dark areas have gone solid. In the second you can still see the detail in the shadows, and the colours look like the real place.
What to ask the designer for in future
Section titled “What to ask the designer for in future”Now that the website is live, the simplest thing is to ask the designer to supply images already in the correct web format (WebP or JPEG, in sRGB colour), rather than print EPS files.
If the designer prefers to keep sending EPS files, that is fine, but the files then have to be converted before they go on the site. In that case we can provide a small script that converts a batch of EPS files correctly and consistently, so the colour is always right. The script can be run by whoever prepares the images, the designer or the office.
The key point: EPS files should never go straight onto the website. They always need converting first, and the conversion has to be done the correct way so the colours stay true.